Create a Webhook
This guide outlines the steps to create a new webhook for your table. Webhooks are automatically sent whenever you load new inputs into the table using the Load Inputs button, providing real-time notifications or triggering external processes based on table updates.
Accessing the Webhook Creation Page
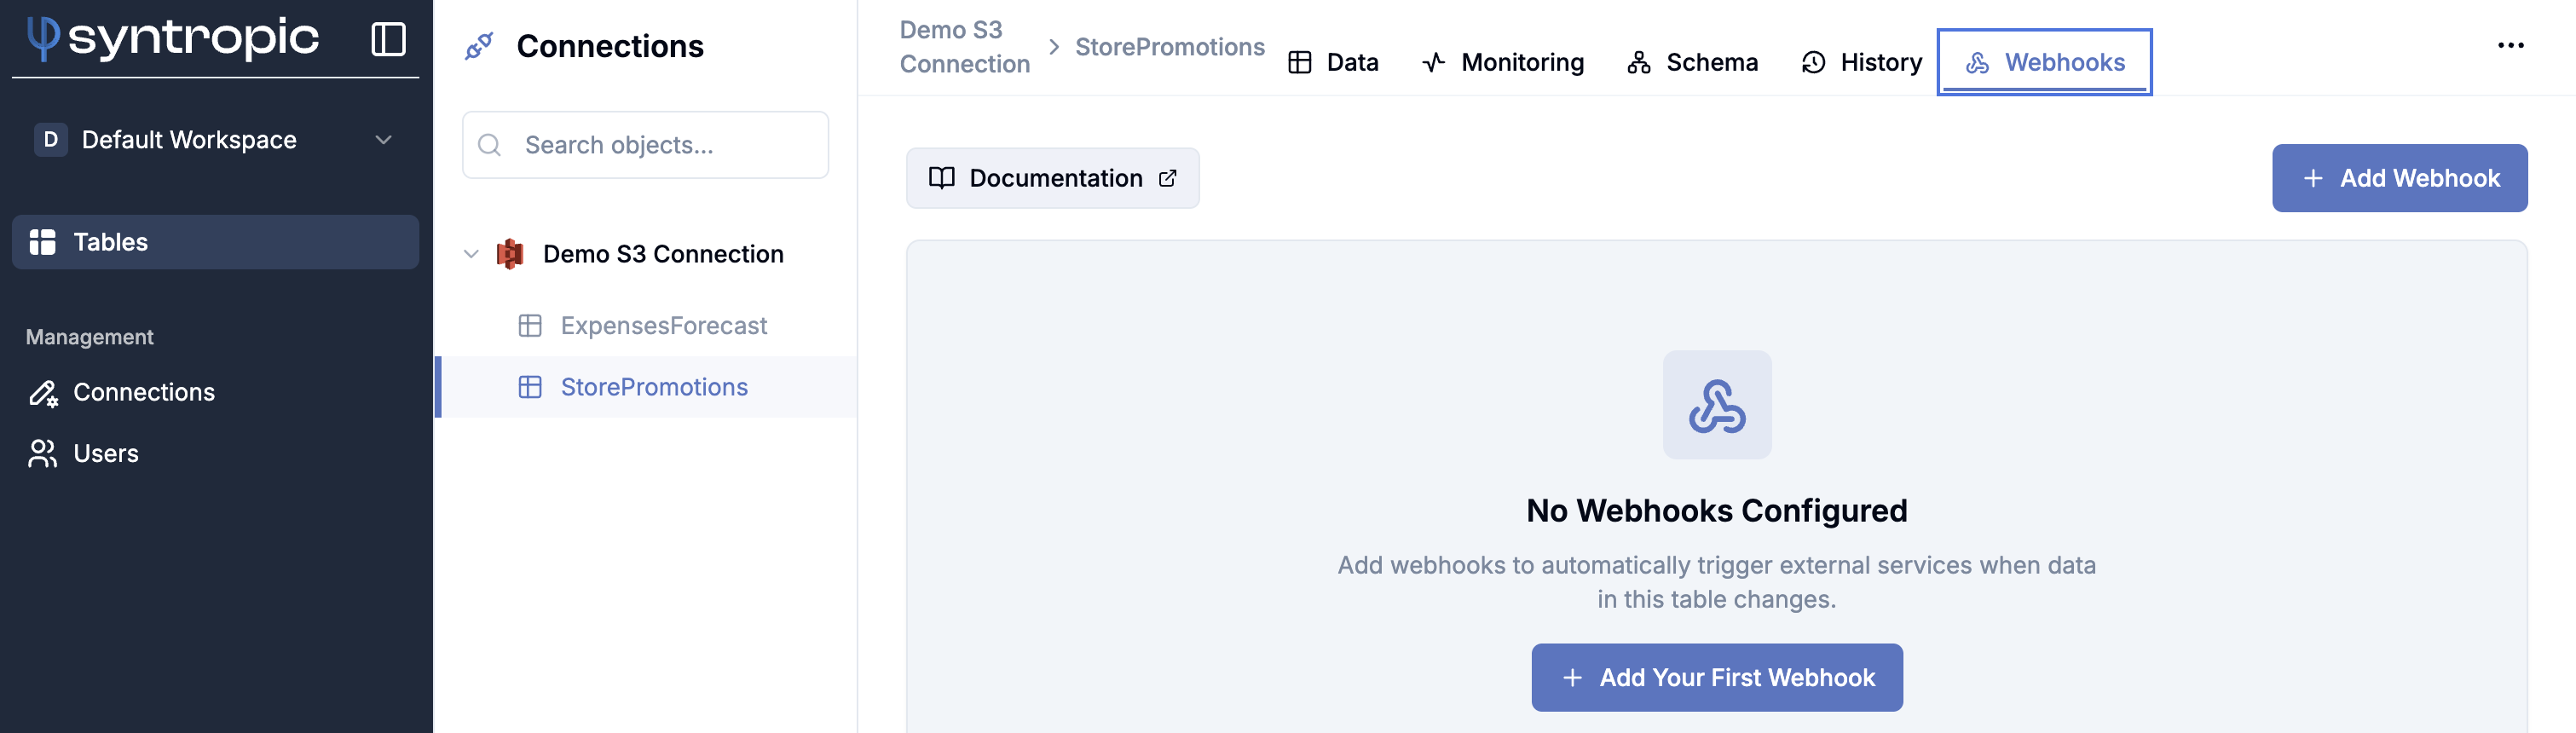
- Navigate to the Tables page.
- In the sidebar, select the specific table you wish to configure a webhook for.
- Click on the Webhooks tab located at the top of the table view.
- Click the Add Webhook button to open the "Add Webhook" configuration page.
Configuring the Webhook
Once on the "Add Webhook" page, you can define the specifics of your webhook:
tip
If you have already configured a webhook for another table within the same connection, you can easily copy its configuration to this new webhook using the Copy Existing tab. This makes the initial setup particularly valuable, as you can reuse it across multiple tables.
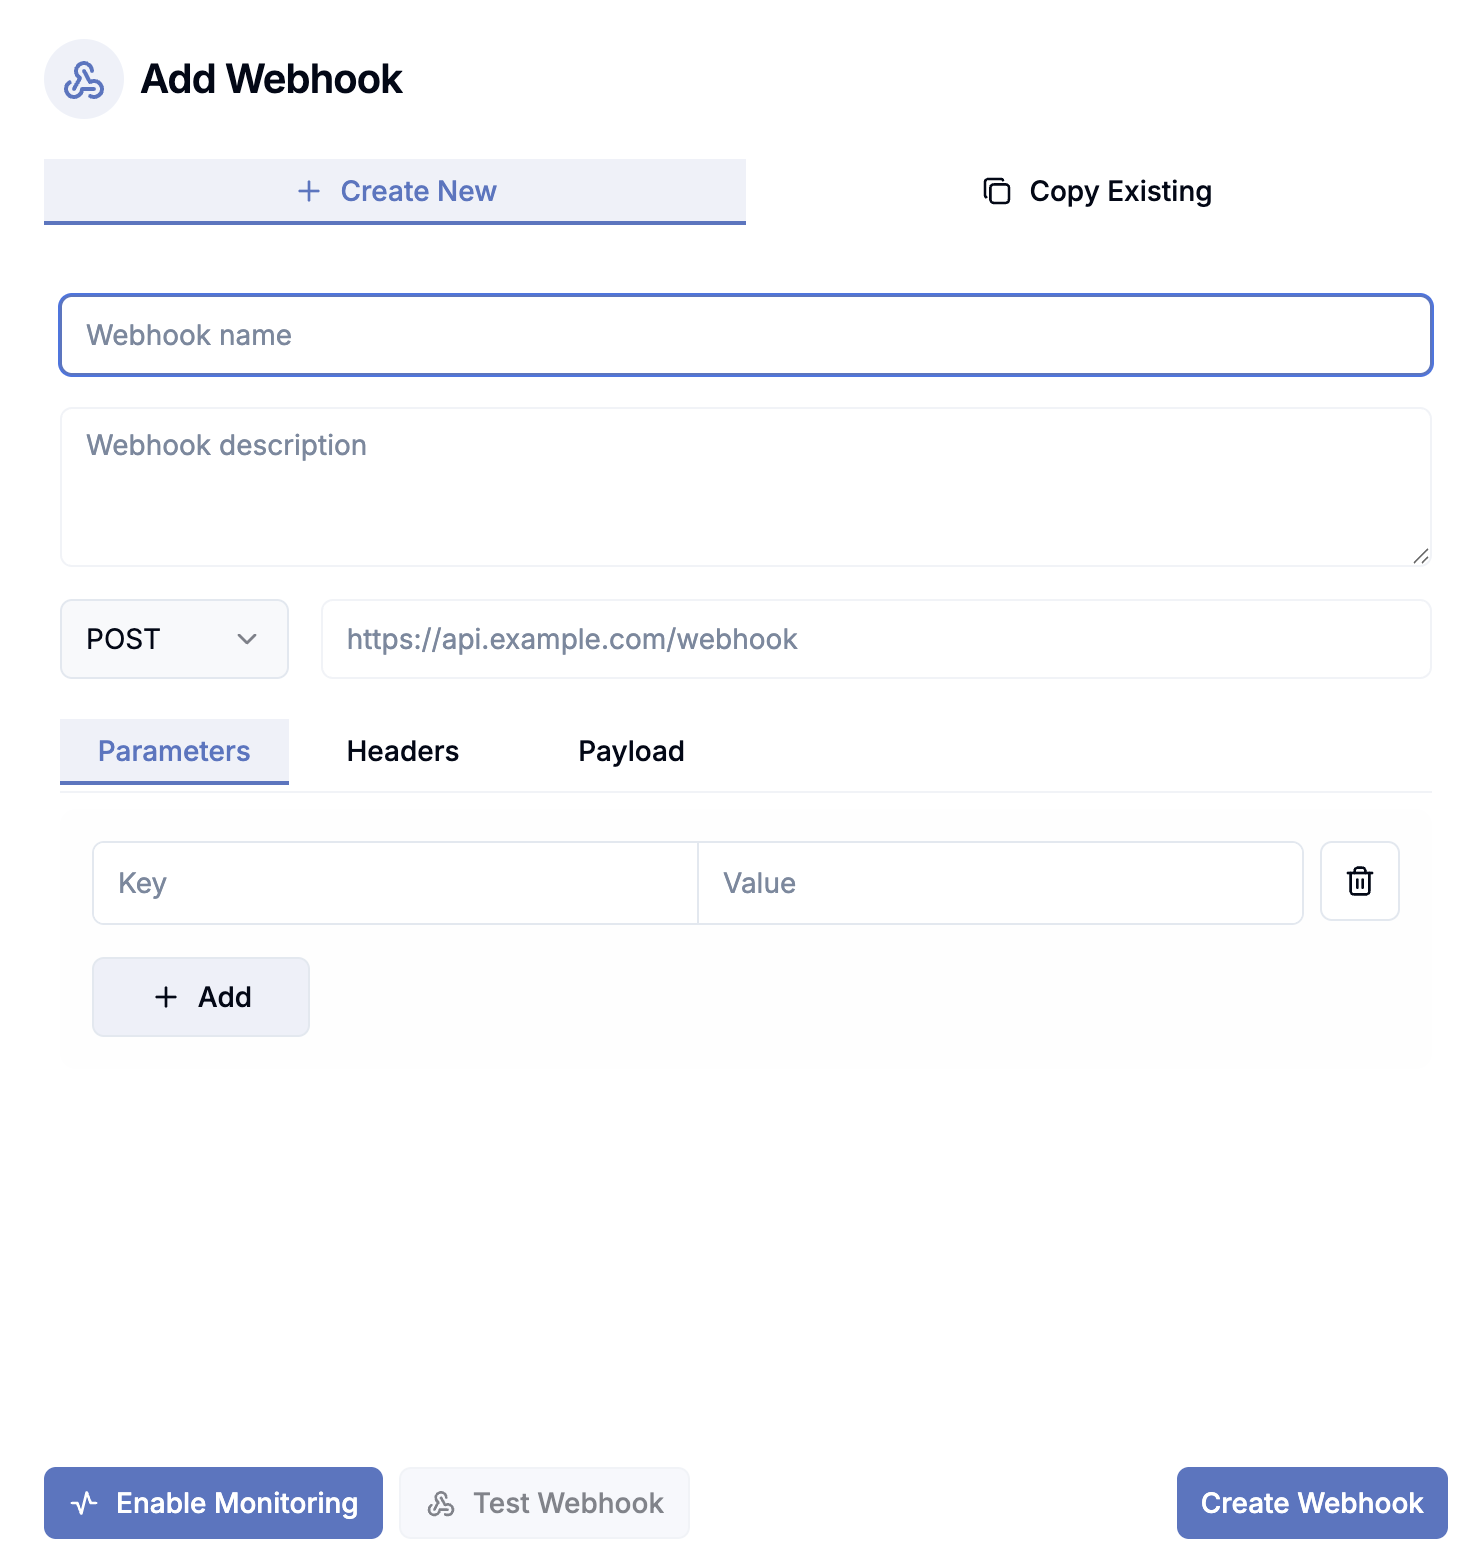
- Webhook Name: Provide a descriptive name for your webhook for easy identification.
- Webhook Description: (Optional) Add a more detailed description explaining the purpose or function of this webhook.
- HTTP Method & Endpoint URL:
- Select the appropriate HTTP method (e.g., POST, PUT) from the dropdown menu.
- Enter the target URL where the webhook payload should be sent.
- Parameters, Headers, and Payload:
- Use the respective tabs (Parameters, Headers, Payload) to configure the data sent with the webhook request.
- For Parameters and Headers, you can add key-value pairs. Click + Add to create new entries and the trash icon to remove them.
- The Payload tab allows you to define the request body, often in JSON format.
Finalizing
- Create Webhook: Once you have configured all the necessary details, click the Create Webhook button at the bottom right to save your new webhook.
- Test Webhook: After creation, you can use the Test Webhook button to send a sample request to your specified endpoint and verify the configuration.
- Enable Monitoring: Monitor the status of the job triggered by your webhook directly within Syntropic. When enabled, Syntropic provides an endpoint for your service to report back whether the job succeeded or failed upon completion. See Webhook Monitoring for setup details.